Guides / Boards and insulation
Loft insulation rolls compared: 100, 170 and 200 mm
Compare common mineral-wool loft roll thicknesses, coverage and layering for a cold UK loft.
We haven't tested these products. This comparison is based on makers' published specifications and manuals, retailer listings and owner reviews (checked 15 November 2026).
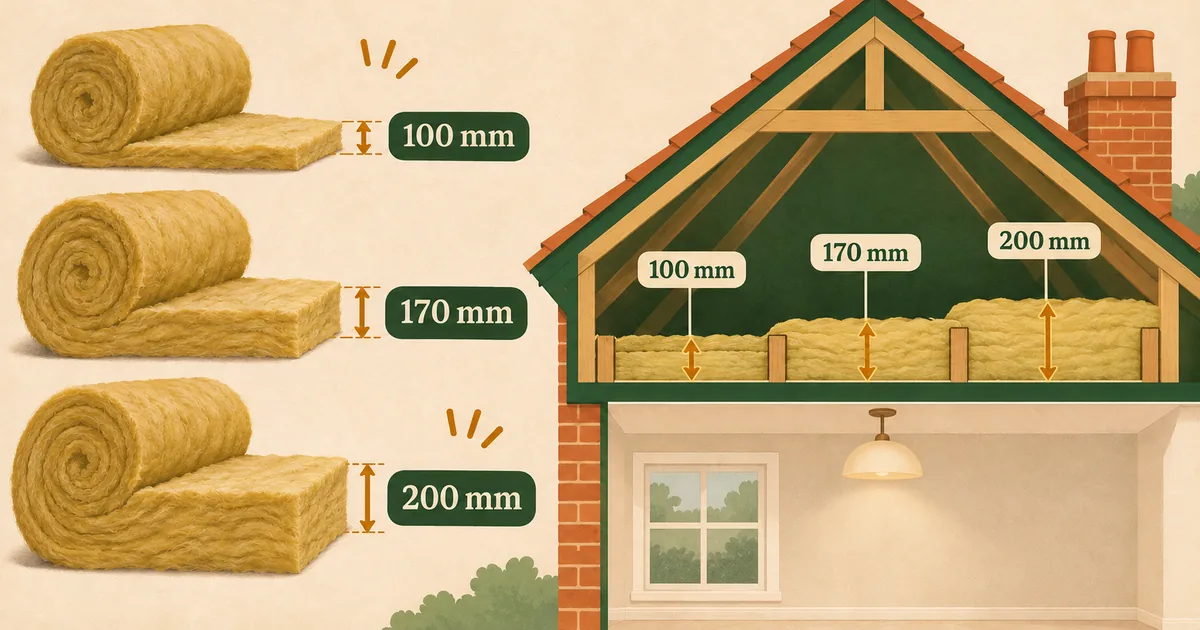
Choose a loft roll by the required thermal design, installed depth, width between joists, coverage per pack and fire and handling information—not colour or headline thickness alone. For a simple cold loft, Energy Saving Trust recommends at least 270 mm of mineral-wool insulation at ceiling level.
Common layer combinations
| Existing condition | Typical arithmetic | What to verify |
|---|---|---|
| Empty joist bays around 100 mm deep | 100 mm between + 170 mm across = 270 mm | Joist depth, product widths and ventilation at eaves |
| Sound 100 mm existing layer | Add 170 mm across = 270 mm total | Existing material is dry, continuous and suitable to retain |
| Sound 120 mm existing layer | Add at least 150 mm to reach 270 mm | Available product thickness and resulting total |
| Already 270 mm or more | Do not add by habit | Condition, continuity and current thermal assessment |
The sums are not interchangeable with every insulation material. Rigid boards, blown fibre and warm-roof constructions have different designs. This guide concerns mineral-wool rolls in an ordinary cold loft.
100 mm base rolls
A 100 mm roll commonly fills the space between ceiling joists. Measure the clear bay width rather than assuming 400 or 600 mm centres. Services, noggins and irregular spacing change the cuts. The material should fit without large gaps but should not be rammed into a narrower space.
Wickes' guide opened on 15 November 2026 listed a Knauf 100 mm bottom-layer roll covering 11.08 m². Coverage is product-specific and assumes the roll is installed at its intended thickness. Use the coverage printed on the pack you are actually buying.
170 mm top-up rolls
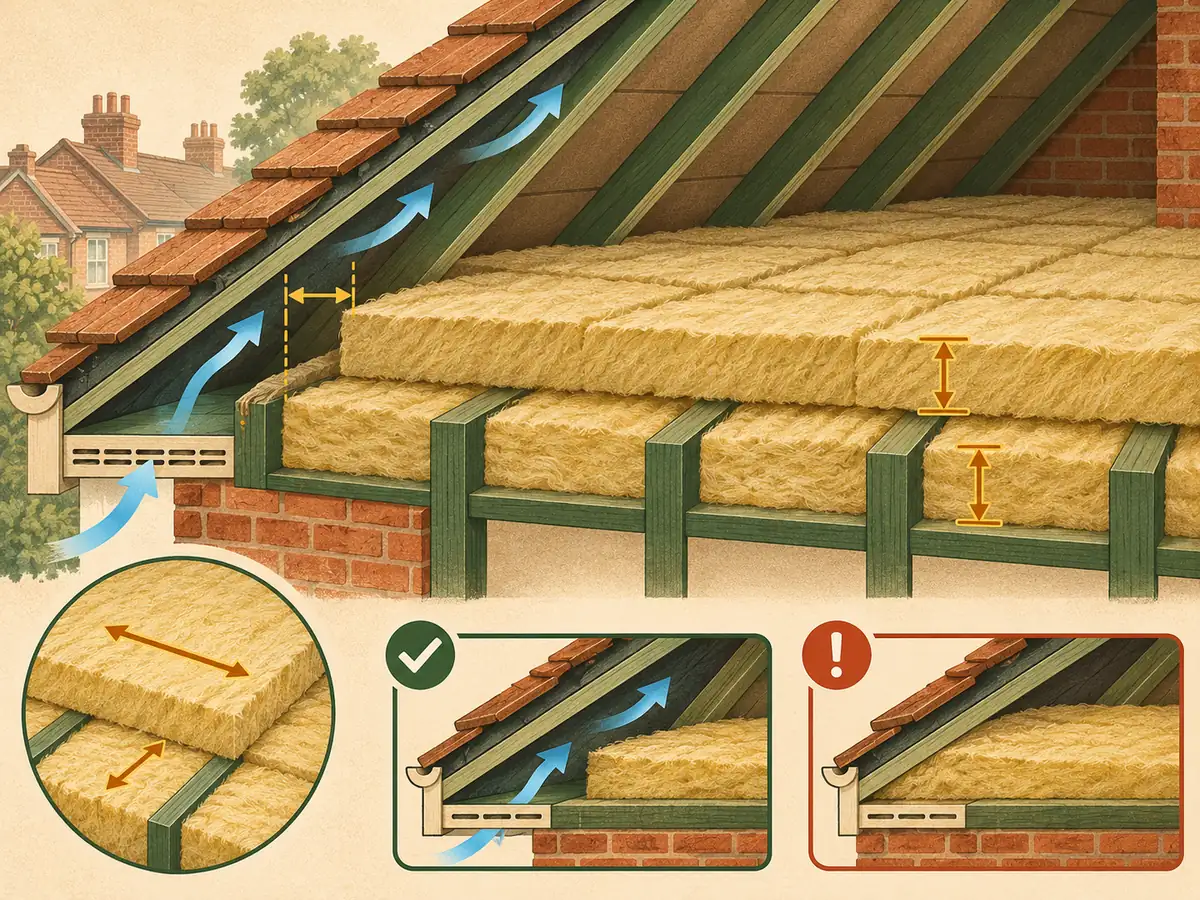
A 170 mm roll laid across a 100 mm base reaches the 270 mm recommendation. Cross-laying reduces the repeating thermal bridge of exposed joist tops and can cover small joints in the first layer. It must not block eaves vents or cover equipment that requires clearance.
The Wickes listing gave 6.47 m² coverage for its 170 mm roll. Whole rolls must be rounded up. Offcuts may fill compatible areas, but do not count compressed scraps as full-depth coverage.
200 mm rolls
A 200 mm top-up over 100 mm gives 300 mm. That can be a valid product arrangement where space and ventilation allow, but more thickness is not a reason to crush the layer beneath boarding. The opened Wickes listing gave 5.61 m² coverage for a 200 mm roll.
A raised deck must clear the installed build-up. With 100 mm joists and 300 mm total insulation, 200 mm remains above the joist top, so a 175 mm leg would be too short geometrically. Select a taller approved system or revise the insulation design with competent advice.
Thermal performance and product data
Thickness alone is not the complete thermal specification. Isover lists Spacesaver Plus with thermal conductivity of 0.040 W/mK, Euroclass A1 reaction to fire and perforations for 386 mm or 580 mm strips. Another roll may have different conductivity, widths or fire classification. Use the declaration and data sheet for the exact product.
Do not mix a maker's coverage figure with another maker's thickness or price. The calculator makes its roll default visible and lets you see the whole-roll rounding; replace it with the pack you choose.
Before laying a top-up
Inspect for roof leaks, condensation, mould, damaged wiring, unlagged pipes, uncovered tanks, suspect asbestos and signs of bats. Stop and resolve those issues. Keep safe working boards over joists; plasterboard is not a walking surface.
At the eaves, use a suitable detail that retains insulation without blocking airflow. Do not push the roll into the roof underlay. Keep access to electrical junctions and valves. Downlights need their specified clearances or compatible rated protection.
Handling and installation
Follow the maker's personal-protection and cutting instructions. Long sleeves, gloves, eye protection and suitable respiratory protection may be required. Ventilate the space and bag waste. Do not work in excessive heat or where access is unsafe.
Lay the first layer between joists with close but uncompressed joints. Lay the second at right angles. Mark the position of joists and services before they disappear. Around the hatch, insulate and draught-seal the lid with a compatible detail while keeping the mechanism clear.
Buying decision
Start with measured existing depth and area. Choose the combination that reaches the intended thermal design without blocking ventilation. Compare packs by installed square metres at the required thickness, not compressed pack volume. Then select a raised deck height that preserves that depth.
For damp, inaccessible, flat or complex roofs, Energy Saving Trust recommends professional input. A cold loft that already has condensation is not a straightforward roll-and-board job.
On delivery, verify that every roll has the chosen thickness and coverage; compressed packaging can make different products look alike. Keep rolls dry and do not open more than can be installed safely in the session. After laying, collect wrappers and offcuts so they cannot block ventilation or hide a missed gap. Photograph the first and second layer before the raised boards conceal their pattern.